Calisthenics has become a staple of even the most ordinary of workout regimens but once you get the hang of traditional moves, it can be difficult to step up and start to challenge yourself with them.
If you’re not ready to add weight belts or weight vests, you can challenge yourself with more difficult moves that engage the same muscles.
You’ve mastered the regular push-up, the pull-up, dips, and squats, not it’s time to step up the game.
You won’t need much for equipment but the variations in style will keep your muscles screaming and your body-building timetable on track.
Be sure to check with your doctor or trainer to be sure that your body can handle the change-ups!
Calisthenics, even advanced versions, are great for any workout fanatic because they can be done almost anywhere.
No need to lug along heavy equipment or find a gym when you’re on the road.
With minimal equipment needed, these exercises are accessible to nearly everyone, beginner to advanced students.
Why Calisthenics?
Most people hear the word “calisthenics and they imagine all the exercises that Army, Navy, and Marine recruits do daily.
The principle behind the moves is the same when you take them from basic training to the gym or your backyard.
Calisthenics is bodyweight exercises that engage multiple muscle groups each time you go through the workout.
Unlike gym equipment and weight machines, bodyweight exercises included in calisthenics engage multiple muscle groups at a time.
Weight machines and the repeated motions of lifting weights teach your muscles to respond in the same pattern.
Bodyweight exercises train your body to be more flexible.
As the body engages multiple muscle groups, the exercise itself pushes your muscles to the limits and begins training your muscles to react and be flexible to the situation.
While it may seem tempting to jump right in with the hardest exercises to build the leanest muscle and shred the fattest fast, you need to start slow and work your way up.
Diving in headfirst is a good way to end up hurting yourself. Start with the lower progressions and work your way up to these hard calisthenics moves.
Olympic gymnasts, professional athletes, and gym rats all use calisthenics in their regular workouts.
The cardio and strength training combination that comes naturally in these moves makes it a great choice for anyone building up those muscles.
You won’t see changes overnight but with healthy workouts and a balanced diet, you can see big changes in time!
Weight machines and gym weights can make it easy to have bad form and only engage major muscles.
Calisthenics and bodyweight moves utilize the major muscles as well as coordinating ones that might not otherwise get a full workout.
This strengthens the whole body rather than just creating muscles for show.
Best Advanced Calisthenics Exercises
There’s a reason that gymnasts and Olympic athletes are stacked and a lot of it comes down to their calisthenics routines.
With advanced exercises like these, muscles start to grow and take on a life of their own.
Be sure to ask your doctor or trainer if you’re ready to move on to these exercises and stick with the progressions of each move before you try the hard versions.
Not everyone can do a handstand with just two fingers on their first try!
And attempting it before you’re ready is a good way to end up injured.
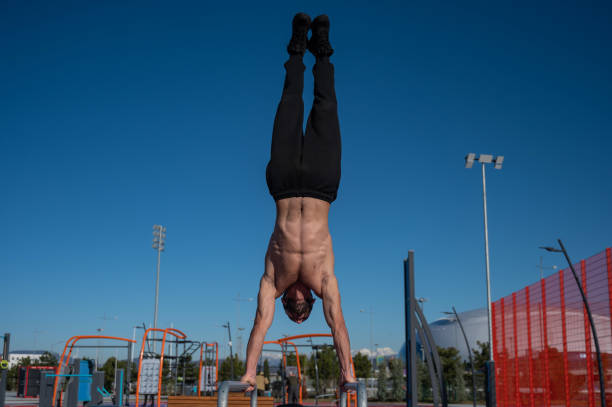
Two-Finger Handstand
If you’ve reached this level, you’ve already progressed through regular handstands and fingertip versions before reaching this one.
The two-finger handstand allows you to keep your balance between the two fingers but stretch your ability and your muscles.
The risks associated with this move are serious. Finger bones and joints are small and tend to be fragile.
If you move into this progression before you’re ready, there is a chance you can break them or snap a tendon in the motion.
Start this move against a wall to help you keep your balance so you can move smoothly into the progression. Even fingertip handstands against a wall are a huge step and strain on your muscles.
Keep up practicing before attempting the two-finger handstand yourself!
One Arm Pull-Up
Pull-ups alone are a huge achievement and being able to do 3 sets of 10 reps smoothly and without hesitation is an accomplishment for any gym rat or workout fiend.
Doing one-arm pull-ups is even more impressive!
The explanation is simple and straightforward: choose one arm and go through the motions of a pull-up.
This move puts a lot of strain on your shoulder joints so be sure that you’ve gone through all of the proper progressions before attempting it.
One-arm pull-ups, while they may take time to reach through the progressions, are an excellent exercise for your back and biceps as well as your shoulders.
Focus on your form as you go through your sets and reps to be sure that you’re engaging your muscle groups as much as possible.
V-Sit
If you’re ready to push your abs, arms, and glutes to the extreme, it’s time to move on to the V-sit!
Start with your body and bottom on the ground with your legs stretched out in front of you and your palms flat on the ground.
You’ll then push your entire body off the ground and lift your legs toward your head until your body makes a V.
Instead of going through this motion in 3 sets of 10 reps, you’ll engage your core, arms, and glutes to hold this position for as long as possible.
This move requires so much core strength and flexibility that it’s nearly impossible unless you’ve spent quite a while going through the progressions.
Before trying to show off this move in front of your friends, spend some quality time going through the L-sit tucks, L-sit flat tuck, a full L-sit, and then see if you can master the V-sit!
Your triceps, abs, and entire body will be feeling the burn the next day.
Triple Clap Push-Ups
Push-ups are the staple of nearly any calisthenics routine and mastering them with the right form doesn’t take long.
To add some of a challenge to the move, you can start adding in some simple moves that will help you advance your moves.
Adding in some claps also adds explosive power to your routine!
Before long you’ll find that your quick-twitch muscles are working even more effectively and efficiently.
You’ll need to be able to harness a lot of agility and coordination to do a triple clap push-up from start to finish.
The entire move will end up targeting your chest and triceps as well as your entire core.
To be able to push up far enough, pull your arms back, clap three times, and then come back down in the correct form requires a lot of coordination.
Start working toward this by mastering the back clap push-ups then double clap push-ups, advancing to elevated triple clap push-ups, and finishing with the full triple clap push-ups.
Front Lever
The key to the front lever is not how big you are but really how tall you are! The taller you may be, the harder it may be to complete this move on the bar and for your bar calisthenics moves.
This move completely engages your lats and forces you to lock them into a place to hold yourself out from the bar.
Several steps lead up to the full front lever.
Start by practicing a tuck front lever where you grab the bar with an overhand grip and pull your legs and hips up at the same time and lean back.
Your back will end up almost parallel to the ground when you’ve pulled yourself into the move.
To advance toward a full front lever, start in a tuck front lever and straighten your back instead of rounding it.
Open up your legs just slightly in the following progression so they’re perpendicular to your body which will increase your leverage.
The next step is one bent leg front levers where you let your lower leg be perpendicular to the ground but open up your hip completely.
The final version is the full front lever.
You’ll start in the early progression of the tuck then keep both of your legs together and slowly extend them out at the hips and knees until they’re straight and parallel to the ground.
Your abs, lats, and arms are going to feel the burn, and your coordination will be pushed to the limit with this move!
The Wheel Roll Out
Most calisthenic exercises can be accomplished without equipment but this one does require some simple pieces to perform.
To finish this move you’ll need a wheeled roller which you can find at your local gym or pick up at a sports equipment store!
Start with the ab wheel pulled up close to you and engage your shoulders, back, glutes, and hip flexors.
Roll out completely with your arms held straight in front of you and keep your core engaged as much as possible.
Return to the starting position and repeat for your three sets of 10 reps!
The progressions for this move are very simple, starting with knee wheel rollouts then partial wheel rollouts, and culminating in the full wheel rollout.
Keep your core engaged and use your hip flexors to keep tension on the wheel.
90 Degree Push-Up
Start with your body in a position that’s like the elbow lever but keep your elbows out and away so they aren’t supporting your body.
Keep your entire body straight then press into a shoulder stand and then a handstand push-up. Reverse the steps to get out of the move.
Before you attempt this 90-degree push-up, you’ll need to master the freestanding handstand and keep your body in a straight line easily.
Then work your way through handstand push-ups, elbow levers, shoulder stands, and partial 90-degree push-ups before attempting something full-fledged.
Keep your fingers pointing outward so you won’t put too much stress on your wrists as you go through the move.
If you’re not quite ready for other progressions you can practice with going from a handstand to an elbow lever and then reverse the move.
Handstand Press
Once you’ve surpassed freestanding handstands you can move on to the handstand press.
Start by putting your hands down like you’re going to move into a full handstand. Instead of kicking your legs up straight, you’ll lean forward and keep your arms straight then push yourself into a handstand.
You can advance this move even further by moving from a V-sit to a handstand without returning to the floor.
The most advanced form of this move is the one-arm handstand and takes a while for even acrobats and gymnasts to master.
This move is going to end up engaging your core primarily as well as your arms and shoulders to complete the entire move.
Harop Curl
We often don’t pay much attention to our hamstrings or quads and that is often to the detriment of our knees.
Strong hamstrings and quads lend themselves to healthy knees and joints!
Working your way up to this level of a curl will keep your body strong.
This is essentially going through a hamstring curl but instead of a machine, you’ll end up using your body weight to perform the exercise.
Start with hip bridges, single-leg hip bridges, assisted harop curls, and then progress to the full harop curl.
Keep your whole body engaged to make the exercise easier to perform and keep the tension on your body high.
If you want to make it even harder you can use an inclined surface or a weighted vest to add increased resistance.
One-Handed Superman Push-Up
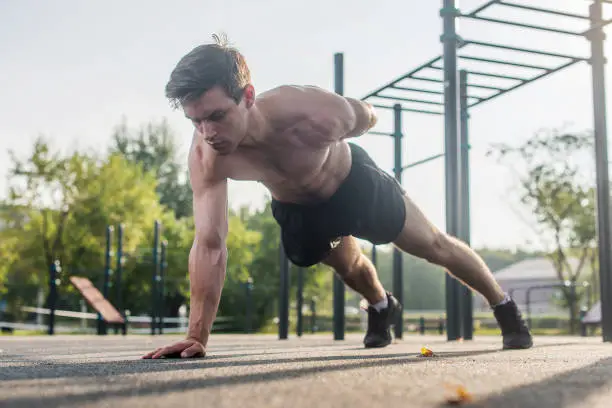
If you’ve mastered the Superman push-up and you’re ready to take it to the next level, you can upgrade your expertise by adding in a one-handed version!
This push-up variation works the entire body but focuses primarily on the lower back, core muscles, and shoulders.
Start this variation on the gym with your body flat on the ground and both your arms and legs stretched out in front of you.
Push your body off the ground just a few inches and then return yourself to the starting position.
To reach the Superman level of push-ups, work through the progressions of convict conditioning push-ups and you’ll be able to do this superhero level workout with ease.
This can end up putting a lot of stress on your back so take it slow and work up to the progression of Superman-style.
Give your body time to adjust and adapt to the new level of tension.
Human Flag
You’ve probably seen someone executing this move at the gym or even out in the world.
It takes tons of coordination and a huge amount of strength in the wrists, shoulders, and abs to pull off.
You’ll have to really concentrate and practice as much as possible in all the various progressions to show off with this move!
The move itself is very simple. Start with your feet on the ground and your hands around a vertical pole.
Slowly raise your legs off the ground until they’re parallel to the ground and your whole body seems to be flying in the wind like a flag.
Concentrate your entire strength into your hands and wrists and engage your core as much as possible as you use those muscles to raise your body off the ground.
Be sure that the pole you’re using is sturdy enough to hold your weight and that your shoulders and arms can hold your body weight up off the ground.
You’ll need to work through a variety of progressions to build up strength in your shoulders, arms, and core to pull this off!
Keep working and allow your body time to adjust to this new move too!
Manna
If you’ve mastered the V-sit and the L-sit, manna is the next level up. You’ll need to be insanely flexible and coordinated to get this done.
Start in the V-sit and swing your body under to tuck your knees next to your face.
This move puts a lot of pressure on your shoulders so be sure you’ve worked your way up through the progressions to reach this stage.
This is going to push your body in the realm of flexibility and put a lot of strain on your shoulders.
Be sure that your body can handle the stress and that you’re ready to move on to this level.
One-Finger Pull-Up
The pull-up is the ultimate flex and being able to do a full 3 sets of 10 reps smoothly and efficiently is the pinnacle of gym excellence.
If you’re ready to take it a step further and show off, even more, you can start to implement the one-finger pull-up in your next gym routine.
This is going to require a lot of wrist, shoulder, and hand strength to pull this off. Start in the same position that you’d begin with a pull-up.
Remove your fingers from the bar until you’re hanging by just one finger.
Use the same form and focus on pulling up with your wrists, shoulders, and arms to complete your sets of one-finger pull-ups.
Unless you’re extremely confident in your skills when it comes to this maneuver, it might be worthwhile to get a buddy or trainer to spot you just in case your grip isn’t quite up to snuff the first time.
Use some chalk as well to make sure your grip is strong when you execute the move.
Frequently Asked Questions
Before you launch yourself into a new workout routine, there are probably a few questions you want to ask so you can be prepared!
Rather than diving in headfirst with a whole routine, start slow and make sure all of your questions are answered before you advance to the hardest moves in the repertoire.
Why is Calisthenics so Hard?
Everything is on your body and your bodyweight. Instead of the help that can come from a machine or weight set, your body is in control of the resistance and the level of intensity.
The machines often dictate how much resistance and how hard you can push yourself while bodyweight exercises force you to take charge and make choices.
Instead of simply engaging the same muscles in the same movement, bodyweights engage lots of muscles and force your body to be flexible which comes across as a much harder routine than simple weight machines.
What’s the Hardest Calisthenics Move?
That’s going to be different for each person!
Everyone has their weak spots and the hardest moves for your body may not be the same as someone else.
Spend time going through the progressions for each move before you go on to the more complicated choices for bodyweight moves.
Isolate which areas of your body are weakest and then focus on building them up before advancing to the next move!
Takeaway
If you’re ready to move past the push-ups and pull-ups of your high school gym class, these moves might just be what you’re looking for!
These calisthenics exercises are some of the hardest in the gymnast and acrobatic community.
When you’re ready to move forward and push your body to its limits and build your muscles in no time, start working toward these moves!
You may even find yourself having fun with your workouts!